

Apple’s AirPods have become a big hit, making waves as one of the top wireless earbuds on the market. Their sleek design and user-friendly nature have won over many users.
The best part? You can take them wherever you’re headed without having to fuss about tangled wires!
But because they rely on Bluetooth and need to be powered up, charging can sometimes be a hurdle.
Picture this: you’re all packed and ready for a trip. Your AirPods, having run out of juice, are in their case charging up. Before you set off, you pop them into your ears only to realize — one of the AirPods is silent. It never charged up!
No need to freak out. There’s no immediate need to bolt to the Apple Store.
This is a pretty common issue and luckily, the solutions are straightforward and can easily be implemented right at home.
In this article, I’m going to talk about why this “one AirPod not charging” issue occur, and the steps you can follow to sort it out.
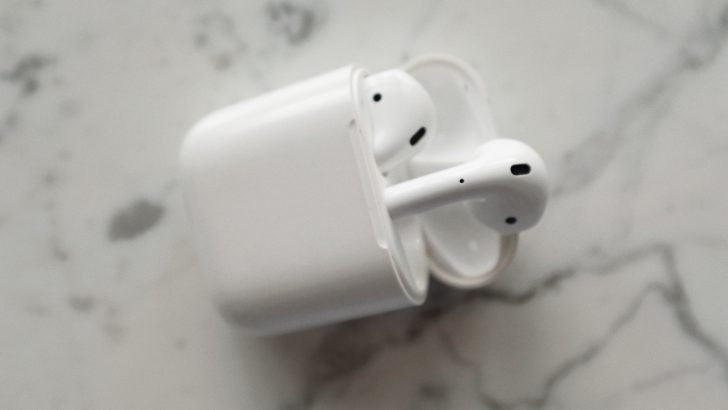
The Clever Fix
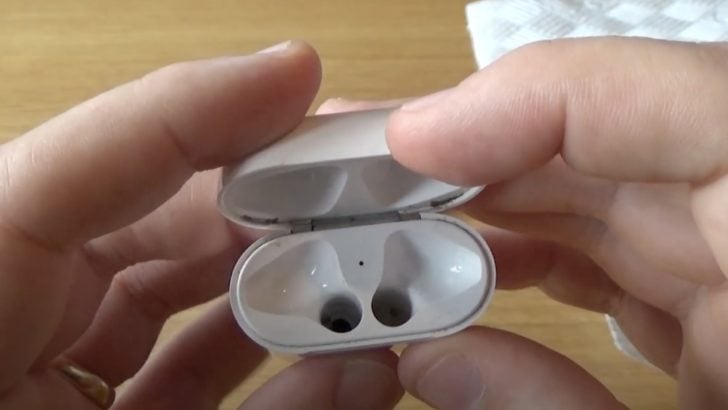
Gently remove any grime accumulated on the metal caps of your AirPods and at the bottom of the charging case.
Why is one of my AirPods not charging?
The culprit is often dirt in the charging case ports and crud on the stem of your AirPods.
Each port of your charging case has two tiny metal connectors, and your AirPods’ stems are capped with metal pieces at the bottom.
For successful charging, these metal pieces on your AirPods need to make good contact with the metal connectors in the ports of the charging case.
If there’s dirt in the ports or gunk on the stem, this can block the connection and prevent a good electrical flow, hindering the charging process.
However, there could be a few other reasons why one of your AirPods isn’t charging. Maybe the case itself isn’t charged, or perhaps the AirPods aren’t inserted correctly. It could even come down to using non-certified third-party cables, software bugs, or outdated firmware.
How to fix one AirPod not charging?
1. Clean the charging case and your AirPods
When’s the last time you gave your AirPods and the charging case a clean?
With everyday use, they can collect earwax and sweat, which attract dust and dirt.
Now, most folks tend to notice the buildup in the speaker meshes of their AirPods. But don’t forget — grime also gathers at the bottom of the stems and dust can get into the charging case, too.
If gunk is blocking the connection between the metal caps on the AirPods’ stems and the metal points in the case’s ports, charging just won’t work.
To give your AirPods a proper cleaning, you could use:
- Q-tips or any cotton swab
- A toothpick
- A clean, dry toothbrush
- A lint-free or microfiber cloth
Use the Q-tips or the toothpick to gently clean the bottom of the stem on each AirPod. Then, the lint-free cloth or dry toothbrush can whisk away any remaining dirt.

You can also use Q-tips or a toothpick for those hard-to-reach spots at the bottom of the case’s charging ports. Just make sure to clear away any dust or lint that’s covering the tiny metal connectors.
While you’re at it, give the rest of your AirPods and charging case a good rub down too. You can even use 70% isopropyl alcohol on the exterior surfaces.
But try to avoid using any alcohol or liquid when cleaning the bottom of the stems and the charging ports — it could spell disaster if any liquid gets inside.
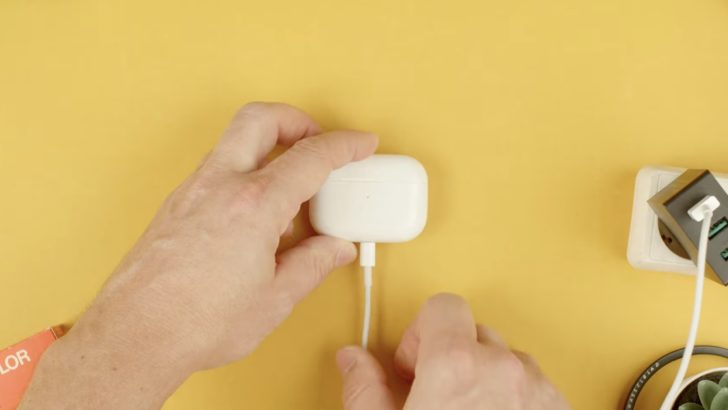
2. Charge the charging case
It’s easy to remember to charge our AirPods, but the case often gets left out.
When your AirPods aren’t inside the case and you open the lid, a light will show you the battery status of the case.
- A green light means the case is fully charged.
- An amber light means there’s less than one full charge remaining.
You can also check the battery level of your case on your device.
- Put your AirPods inside the case and close the lid.
- Bring your device next to the case, then open the lid.
- Wait for a moment to see the battery levels on your device’s screen.
If your charging case only has 10% or less battery left, it won’t have enough power to charge your AirPods.
Remember to keep your charging case charged above the critical level. If you can, try and give it a quick 20-25 minute juice-up daily.
3. Reinsert your AirPods
It might seem like a no-brainer, but one reason your AirPod might not be charging is simply because it’s not properly nestled in the case.
Obvious, right? You’d think so, but trust me, it happens more often than you’d imagine.
The key is ensuring the stems of your AirPods connect with the metal connectors located at the bottom of the charging ports.
If your charging case has a cover on it, try taking it off before popping your AirPods in. Sometimes, the cover doesn’t allow the case to close properly, making it difficult to insert your AirPods correctly.
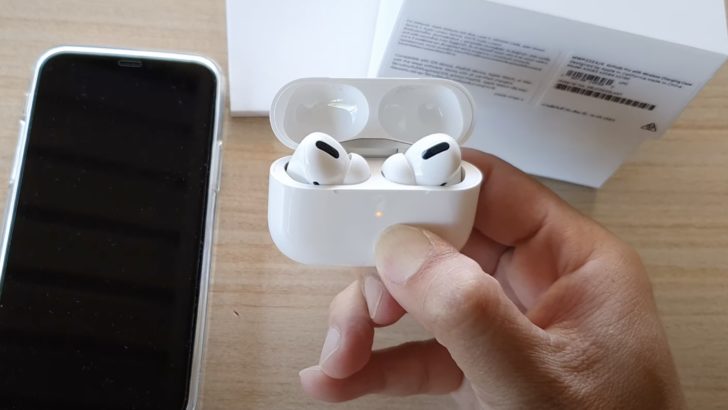
To see if your AirPods are indeed charging, make sure they’re connected to your iPhone and keep an eye on your battery status.
- Put your AirPods in the case.
- Hold your iPhone near the case.
- Open the lid of the case and wait for a few seconds.
- The battery status will appear on your iPhone’s screen.
If your AirPods are charging, a lightning icon should appear next to the battery symbol. You could also add a battery widget on your iPhone for easier viewing.
You may even add a battery widget on your iPhone for easier battery view.
4. Use Apple-certified cables
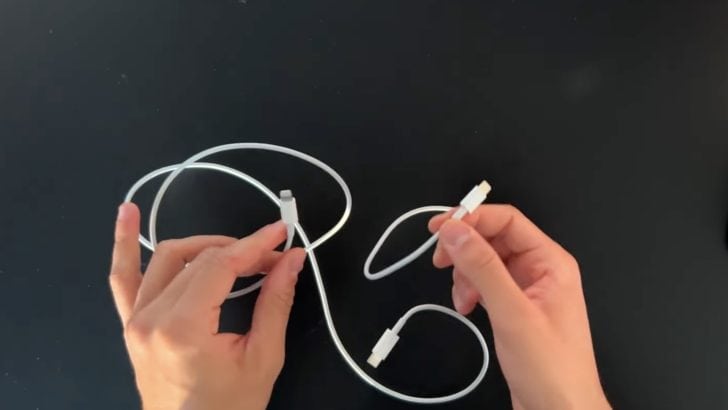
Apple gear comes with a hefty price tag, so it’s understandable if you’re tempted to opt for less expensive third-party cables you find online or at local stores.
But here’s the catch: this might mean you end up with substandard or even fake cables. If one of your AirPods isn’t charging, these non-certified cables could be to blame.
Make sure you stick to using either Apple or Apple-certified cables for your AirPods charger.
If you’re unsure, Apple’s Support page offers tips on how to spot counterfeit accessories.
Believe me, the few dollars saved on cheaper cables just aren’t worth the risk.
5. Reset your AirPods
If one AirPod isn’t charging, it’s possible that there’s a firmware glitch to blame. Cleaning them or swapping out the cables wo’t fix a software issue.
Luckily, all models of AirPods come with a factory reset feature. This can help wipe out any bugs or glitches.
A reset may fix issues like if your left AirPod isn’t working, or if they keep cutting out, or yes, if one AirPod is not charging.
Here’s how to reset your AirPods:
- Place your AirPods in the charging case and close the lid.
- Wait for about 30 seconds.
- Open the charging case lid.
- On your iPhone, go to Settings > Bluetooth.
- Find your AirPods’ name and tap the “i” icon.
- Tap Forget This Device.
- Keep the charging case lid open.
- Press and hold the reset button at the back of the charging case for 15 seconds.
- Wait for the status light on the case to flash amber, and then white
Once you’ve successfully reset your AirPods, you can pair them back up with your iPhone. Just keep the case lid open, and place it near your iPhone.
On your iPhone’s screen, tap Connect and follow the instructions.
6. Update your AirPods’ firmware
If a reset didn’t resolve the firmware glitch, no worries! There’s another option — you can force a firmware update to get that silent AirPod charging again.
Apple frequently releases firmware updates for AirPods to enhance their performance, introduce new features, and patch any bugs.
Normally, these firmware updates are applied automatically, but sometimes the process might not go as planned. In such cases, you can jump-start the update manually.
First, you’ll want to check if your AirPods’ firmware is current. Make sure your iOS is up to date before checking.
- Go to Settings > Bluetooth.
- Find and tap the “i” symbol beside your AirPods’ name.
- Scroll down to Version.
If your AirPods’ version matches the version listed on Apple’s firmware updates page, you’re good to go.
But if it’s outdated, you can trigger an update:
- Place your AirPods inside the charging case.
- Close the lid for around 30 seconds.
- Take your AirPods out and wear them for around 15 seconds.
- Remove your AirPods, put them back in the charging case and close the lid.
- Charge your AirPods charging case using a cable or a MagSafe charger.
- Keep your iPhone near the case for about 10 minutes.
- Open the lid of your AirPods charging case after 10 minutes.
- Recheck to see if your firmware version is now up to date
What if the fixes don’t work?
Contact Apple Support
Generally, the above methods will fix the issue of one AirPod not charging for most users.
But if you’re still experiencing trouble (and I hate to be the one to tell you this), you might need to consider a replacement.
The silver lining here is that you don’t have to buy a whole new pair if only one AirPod is giving you grief. You can actually purchase a single replacement AirPod.
For 2nd or 3rd Generation AirPods, a replacement will set you back $69, while a replacement AirPod Pro will cost you $89.
Before you rush off to the Apple Store, double-check whether your AirPods are still covered by warranty. Apple’s Limited Warranty covers manufacturing defects for a year, so you might be in luck and score a replacement AirPod at no extra cost.
Wrapping up
Don’t fret if one of your AirPods isn’t charging — you’re not alone, and it’s usually something you can solve right at home.
Most of the time, the issue comes down to dirty charging ports or buildup on the metal caps of your AirPods. If there’s too much grime, the two can’t make a solid connection, disrupting the flow of electricity.
Other possible culprits could be a low battery level in the charging case, AirPods not inserted properly, using cables that aren’t certified by Apple, or even firmware glitches.
Usually, giving your AirPods and charging case a good clean and going through the steps I’ve outlined can fix the issue.
But if none of these strategies work, you might need to think about getting a replacement. Don’t worry, if your AirPods are still under warranty, you might be eligible for a free replacement. Just check with Apple Support to be sure.
Did you manage to fix your non-charging AirPod? If so, I’d love to hear which step did the trick! Share your experience in the comments below.