Apple’s AirPods have become a favorite for many folks, thanks to their trendy design and user-friendly features. Their small size and lightweight make them incredibly portable.
Whether I’m heading to the office, going shopping, hitting the gym, or traveling, my AirPods are always in my pocket.
But like any other tech gear, AirPods come with their share of hiccups. One common issue you may have encountered is the battery draining faster than expected.
Have you ever been immersed in an album or podcast only to find out your AirPods are nearly out of juice? Frustrating, isn’t it? As someone who’s looked into and fixed AirPod issues for years, I can assure you, you’re not the only one.
In this guide, I‘ll shed some light on why your AirPods might be dying so fast and share some tried-and-true tips to help you get more mileage out of your AirPod battery.
The Clever Fix
If your AirPods die so fast, avoid deep discharges as much as possible. Keep the battery level of your AirPods between 40% to 80% to extend its battery life.
Why do my AirPods die so fast?
Your AirPods die so fast because their lithium-ion batteries are so tiny. Their size makes them degrade faster, as they usually get several deep discharges daily.
Lithium-ion batteries are usually long-lasting, quick to charge, and have a high power density, which means they can provide a relatively long battery life while remaining lightweight.
However, like all batteries, they gradually degrade over time due to chemical processes.
Given their small size, the degradation of AirPod batteries may be more pronounced than what you’d see on larger devices.
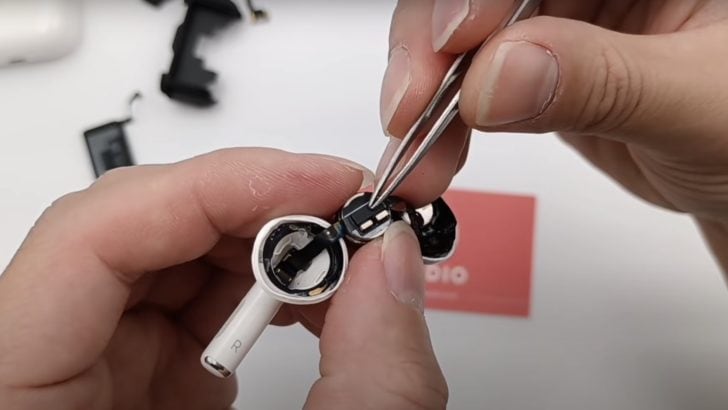
Plus, their batteries have a finite number of charge cycles. This refers to the number of times you can discharge 100% of your battery, although this doesn’t necessarily have to happen all in one go.
For example, if you use 80% of your battery today and recharge it, and then use the remaining 20% the next day, you’ve completed one charge cycle.
While discharging is a normal part of battery life, fully draining your battery (or deep discharging) can rapidly reduce its lifespan.
Deep discharge happens when you use lithium-ion batteries from a full charge until they’re down to about 10% or less.
Unfortunately, AirPods are prone to deep discharging.
Often, we keep them in their case until they’re fully charged, use them for hours on end, and only recharge them when the low battery warning pops up.
Since these batteries charge so quickly, we end up repeating this cycle multiple times a day, causing faster wear.
How long do the batteries of brand-new AirPods last?
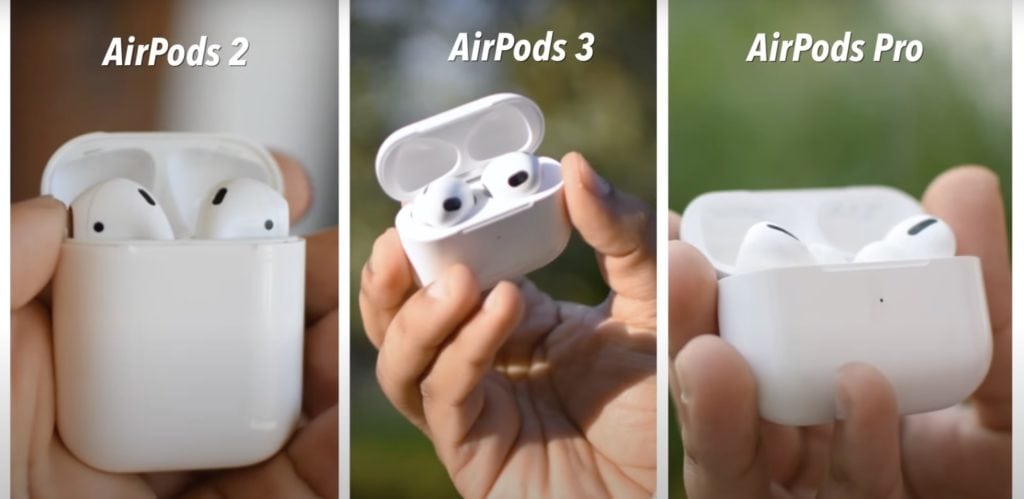
The battery life varies among different models of AirPods.
Comparing your battery performance to a new pair can give you an idea of the extent of your battery’s degradation.
- AirPods 2nd Generation
- With multiple charges in the case: 18 hours of talk time or 24 hours of listening time
- On a single charge: 3 hours of talk time or 5 hours of listening time
- Charged for 15 minutes in the case: 2 hours of talk time or 3 hours of listening time
- AirPods Pro
- With multiple charges in the case: more than 18 hours of talk time or 24 hours of listening time
- On a single charge: up to 3.5 hours of talk time or 4.5 hours of listening time
- Charged for 5 minutes in the case: around 1 hour of talk time or 1 hour of listening time
- AirPods 3rd Generation
- With multiple charges in the case: up to 20 hours of talk time or 30 hours of listening time
- On a single charge: up to 4 hours of talk time or 6 hours of listening time
- Charged for 5 minutes in the case: around 1 hour of talk time or 1 hour of listening time
How do I extend my AirPods’ battery life?
1. Keep the battery level between 40% to 80%
Try to avoid depleting your battery as far as possible.
As discussed above, deep discharges (draining your battery down to 10% or less) speed up battery wear. If deep discharge happens multiple times daily, lithium-ion batteries will deteriorate faster.
By keeping your battery level between 40% and 80%, you can extend its lifespan.
Try charging your AirPods before they hit low battery and stop before they reach 100% full.
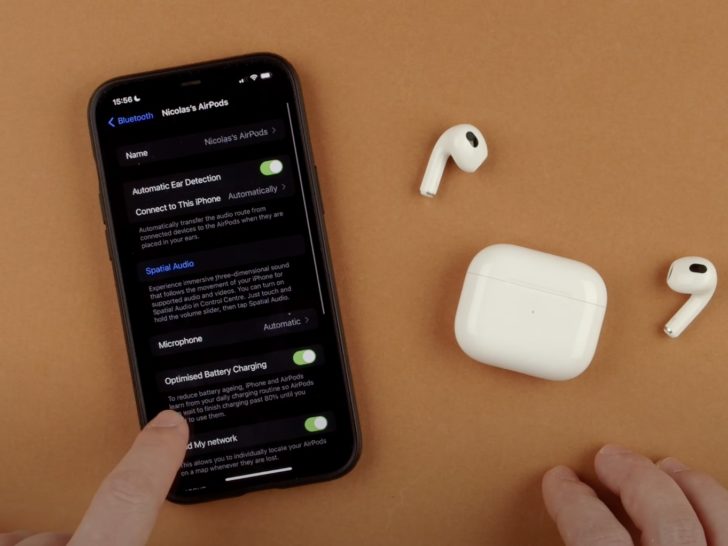
There’s also an AirPods feature that can help you out.
For users of AirPods Pro, AirPods 3rd Generation, or newer models, you can use the Optimized Battery Charging feature.
This feature learns your daily charging patterns, halting the charge at 80% until it predicts you’ll need the extra power.
To turn on this feature:
- Connect your AirPods to your device.
- Place them in the case and open the lid.
- On your device, go to Settings.
- Select Bluetooth.
- Tap the “i” symbol beside your AirPods’ name.
- Turn the Optimized Battery Charging toggle switch on.
This feature minimizes the time your AirPods spend fully charged, slowing down battery degradation.
2. Avoid exposing your AirPods to extreme temperatures

Apple suggests that your AirPods will work best when used in temperatures ranging from 32º to 95ºF (0 to 35ºC). When it comes to storing them, they recommend keeping them in an environment between 14º to 113ºF (-10º to 45ºC).
irPods aren’t fans of extreme heat or cold.
I’ve noticed that my AirPods have a shorter battery life during the chilly winters of the Northern Hemisphere. But here’s the good news — it’s only temporary. As the weather warms up, the battery life bounces back to normal.
However, extreme heat can cause permanent damage to your AirPods’ batteries. This is why it’s crucial not to leave your AirPods in direct sunlight or in a parked car on a sweltering day!
You might observe that your AirPods charge slower when it’s hot, or they may not charge at all. That’s actually your AirPods looking out for their own wellbeing — they’re designed to protect their internal components from overheating.
But remember, it’s ultimately your responsibility to take care of your AirPods. Do your best to avoid exposing them to extreme temperatures.
3. Use a lower volume
Listening at a lower volume consumes less power. So, turning down your volume is a win-win for both your ears and your AirPods’ battery life.
It’s all about finding the sweet spot — the volume level that gives you a comfortable yet clear sound.
You might also want to activate your device’s Headphone Safety features if you’re using an iPhone. Features like Headphone Notifications and Reduce Loud Sounds can be super helpful.
When turned on, your iPhone will gently remind you to lower the volume if you’ve been rocking out to your tunes a bit too loudly for too long. After this handy alert, the volume will automatically be reduced the next time you use your AirPods.
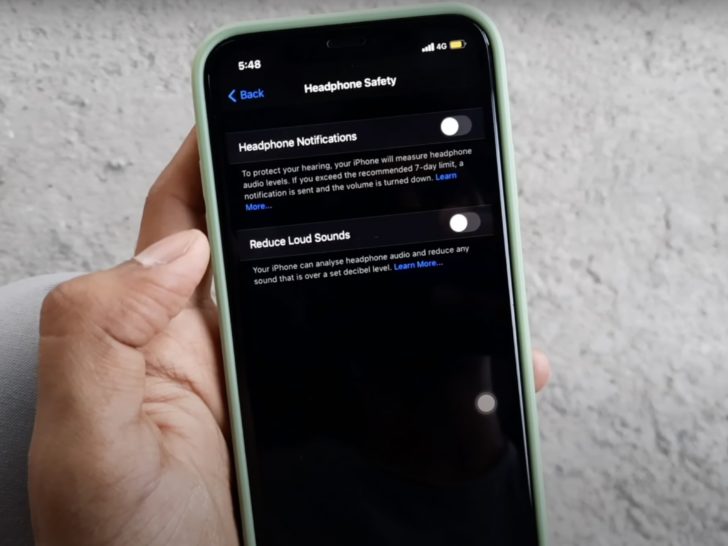
To enable Headphone Notifications:
- Open the Settings app.
- Go to Sound & Haptics.
- Select Headphone Safety.
- Turn the Headphone Notifications toggle on.
The Reduce Loud Sounds feature, on the other hand, keeps track of your volume level and automatically dials it down if it exceeds a certain decibel level (which you can determine).
To activate Reduce Loud Sounds:
- Go to the Settings app.
- Tap Sound & Haptics.
- Open Headphone Safety.
- Turn the Reduce Loud Sounds toggle on.
4. Turn the Smart features off
AirPods are loaded with nifty Smart features that heighten user experience.
For example, Automatic Ear Detection can tell when your AirPods are in your ears and it’ll pause your tunes if you remove one AirPod and stop it entirely if you remove both.
The AirPods also have an Automatic Switching feature which allows them to switch between devices linked to the same Apple ID.
If you’re using AirPods Pro, they come with a Noise Control feature with three modes: Noise Cancellation, Transparency, and Off.
All these features are undoubtedly handy, but you could make do without them.
You can manually pause or play your tunes, switch devices, and you might not always require Noise Cancellation.
Plus, these features can chew through your battery life at a faster pace. So here’s how to turn them off:
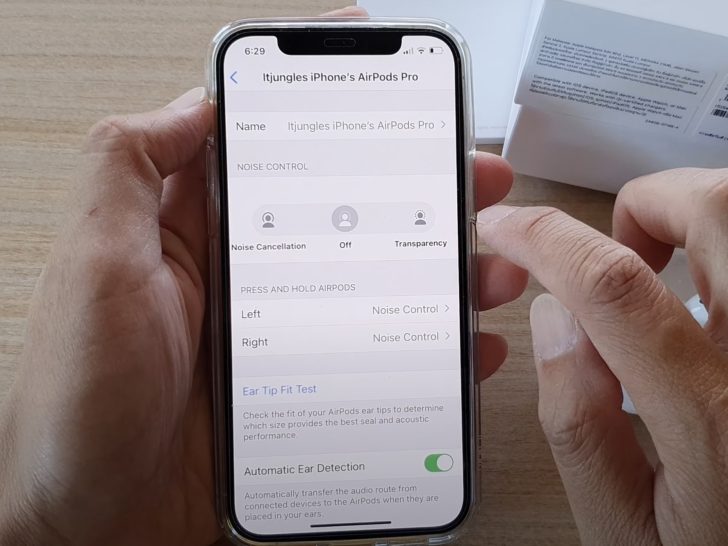
Automatic Ear Detection
- Launch the Settings app.
- Open Bluetooth.
- Tap the “i” icon beside your AirPods.
- Switch the Automatic Ear Detection toggle off.
Automatic Switching
- Connect your AirPods to your device and wear them.
- On your iPhone, go to Settings, then Bluetooth.
- Tap the “i” symbol near your AirPods’ name.
- Select Connect to This iPhone.
- Choose When Last Connected to This iPhone.
Noise Control
- On your device, open Settings > Bluetooth.
- Tap the “i” button next to your AirPods on the list.
- Choose Off under Noise Control.
5. Clean your AirPods and case regularly

It might not be immediately obvious, but your AirPods can get pretty grubby over time. Dust and dirt can sneak into their charging case, and if you’re using them regularly, a combo of sweat and ear wax can coat the speaker meshes and microphone.
Over time, this will attract even more dirt and dust. Not the most pleasant thought, huh?
It’s essential to regularly clean your AirPods (and don’t forget their case). If not, their mic may not work, their sound may go quiet, and they may die faster.
To clean your AirPods and their case, you can use the following:
- Q-tips
- a toothpick
- A lint-free cloth
Gently use the Q-tips to remove any gunk from the speaker mesh and microphone of your AirPods, and the lint-free cloth for a general wipe down.
You can use the Q-tips for cleaning the case too, or try lightly blowing air into it to dislodge any dust and dirt.
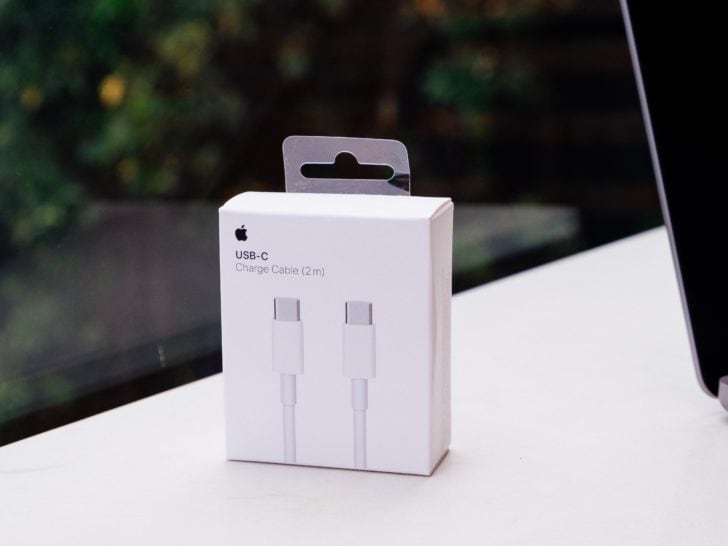
6. Use only Apple cables
I get it. Apple cables (or those certified by Apple) can be pricey. The idea of buying cheaper charging cables might seem more appealing. After all, it’s just for charging, right?
No judgments here if you’re leaning towards cheaper cables. However, these could be a reason why your AirPods are running out of juice so quickly.
Sure, in the short term, you’re saving some cash. But think long term: if your AirPods end up getting damaged, you’re in for a more hefty replacement cost.
Apple has a dedicated page on how to identify counterfeit accessories.
If you want to extend your AirPods’ battery life, stick with Apple or Apple-certified charging gear.
7. Use one AirPod at a time
Using only one AirPod just looks wrong. Agreed?
But hear me out. It may look awkward, but using only a single AirPod in specific situations can extend battery life.
In certain situations, like taking a quick phone call, recording a voice memo, or even jamming to your music one AirPod at a time, this could be a clever little trick to prolong your battery life.
By using your AirPods alternately, you effectively double your listening time.
8. Update your firmware
Sometimes, outdated firmware can be a culprit for rapid battery drain.
Apple frequently releases firmware updates for AirPods, which can help iron out bugs and ensure your AirPods are working as they should.
Although AirPods usually update their firmware automatically, there are times when a nudge in the right direction is required.
Check Apple’s firmware page to know the latest firmware version. Then check if you have the same version:
- Connect your AirPods to your iPhone.
- Put them in the case.
- On your iPhone, go to Settings.
- Select Bluetooth.
- Tap the “i” icon on the side of your AirPods’ name.
- Scroll down to see Version.
There is no definitive method for upgrading your AirPods’ firmware manually. But this is what always works for me. Here’s a quick trick that seems to give the update process a kickstart:
- Put your AirPods inside their case.
- Close the lid of their case.
- Wait for 30 seconds.
- Get the AirPods and wear them.
- Wait for 10-20 seconds.
- Take your AirPods off, put them back in the case, and close the lid.
- Charge the case.
- Place your iPhone beside the case for around 15 minutes.
- Open the lid of your AirPods case after 15 minutes.
- Check the firmware version on your iPhone.
9. Reset your AirPods
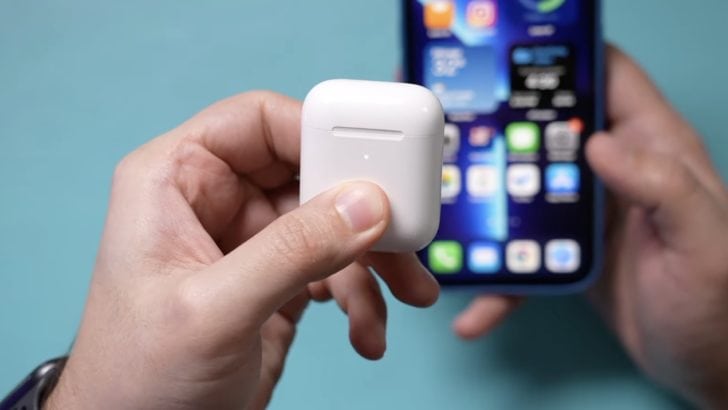
Sometimes, bugs and glitches can mess with your AirPods’ battery efficiency and even hinder them from charging properly.
One quick solution? Give those AirPods a good ol’ reset.
To reset and reconnect your AirPods:
- Place your AirPods inside their case.
- Close the lid of the case.
- Wait for around 30 seconds.
- Open the lid of the case.
- On your iPhone, go to Settings > Bluetooth.
- Tap the “i” symbol near your AirPods.
- Tap Forget This Device and tap again to confirm.
- Keep the lid of the case open.
- Press and hold the setup button on the back of the case for 15 seconds.
- Wait for the light of the case to flash amber, then white.
- Directly go to reconnect mode and keep the lid open.
- Place your iPhone close to your AirPods.
- Tap Connect.
What if my AirPods’ batteries are really old?
Get replacement AirPods
The batteries in your AirPods usually last about 2-3 years on average.
After this period, the lithium-ion batteries may have degraded so much that your AirPods barely last an hour.
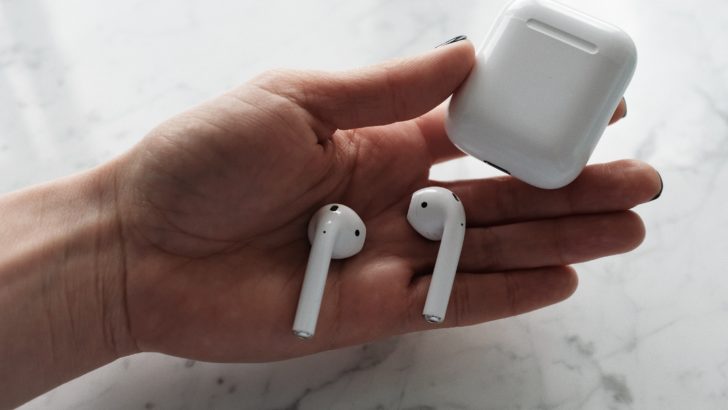
AirPods can’t be repaired, especially when it comes to their batteries. Their repairability score from iFixit is a big fat zero. That means, once the battery goes, you’ll need to get a new pair.
So if your AirPods are getting long in the tooth, it might be time for an upgrade. Apple released the new AirPods Pro 2 with a longer battery life.
Wrapping up
AirPods can drain quickly because their tiny batteries wear down faster and are subject to frequent deep discharges.
Deep discharge refers to using your AirPods from a full charge to 10% or less. The more you do this in a day, the quicker your AirPods’ battery life will degrade.
But you can take steps to extend the life of your AirPods’ battery. Don’t let the battery run out completely, and don’t always charge it to full. Keep your AirPods out of extreme cold or heat.
You can also heed my other advice like turning down your AirPods’ volume, switching off Smart features, cleaning your AirPods regularly, sticking with Apple-certified cables, and keeping your AirPods’ firmware up to date.
If the batteries are beyond help, you’ll likely need to invest in a new pair of AirPods, as their batteries are virtually impossible to replace or repair.

