
What’s more frustrating than a garage door that won’t open when you’re rushing off for work?
Having dealt with such situations numerous times, I learned that the solution is simple – reset it.
I promise it’ll only take you a minute to get it done. Let me guide you how.
The Clever Fix
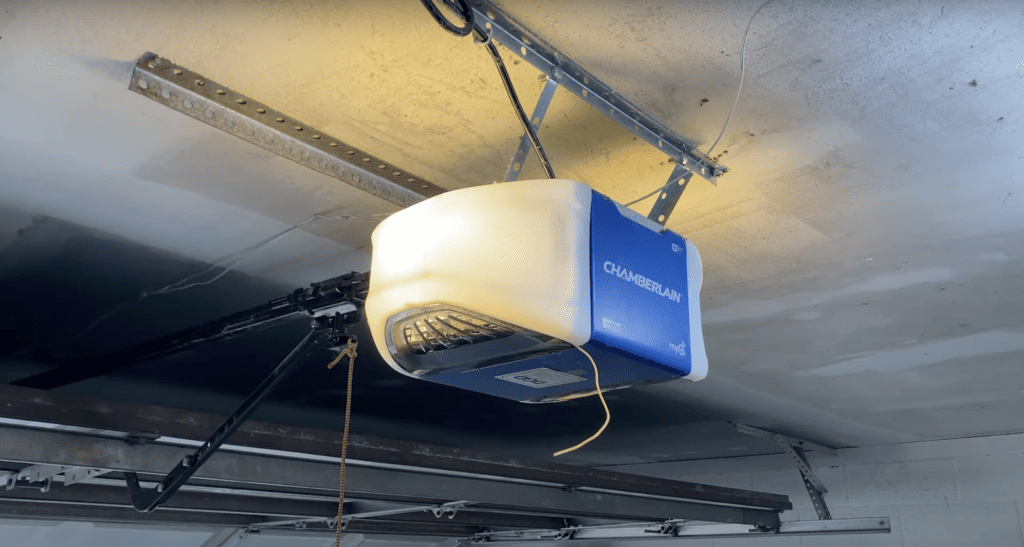
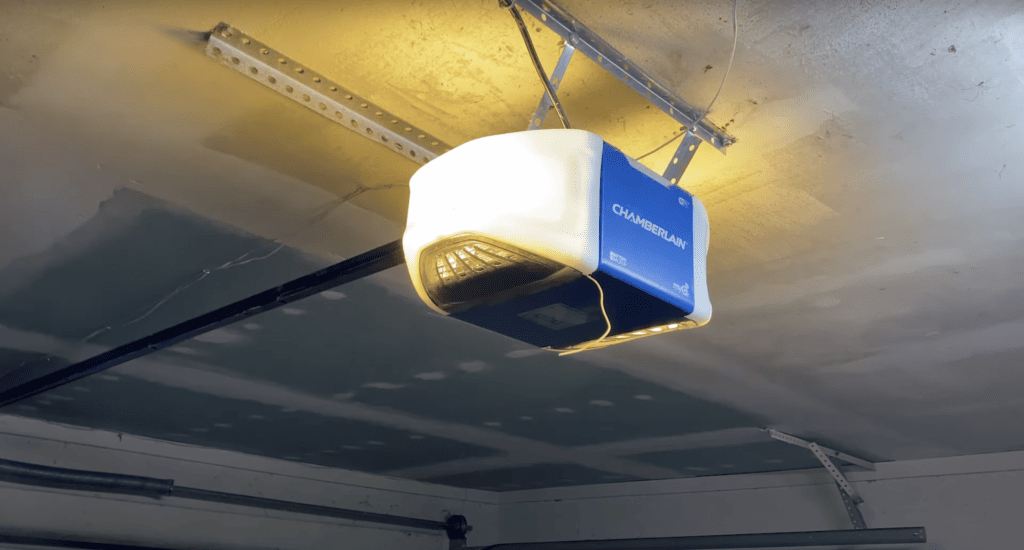
Reset your Chamberlain garage door opener by pressing and holding the Learn button on the back or side of the motor housing for 6-8 seconds until the LED light goes out.
Why you might need to reset your garage door opener

There might be a few reasons to hit that reset button.
Maybe your Chamberlain garage door opener has been acting up lately, like it refuses to open or close properly, get stuck in the process, or make unusual noises. Malfunctioning is like a shout for a reset.
Another reason could be it suddenly becomes unresponsive to remote signals or the keypad even after you’ve changed the batteries or checked for any obstructions.
Additionally, you may need to perform a reset if it isn’t working correctly after a power outage.
The sudden energy supply interruption to your opener causes the system to lose its operating settings, that’s why it won’t work. Resetting the device brings it back to normal working conditions.
There are also instances that you will need to reset your garage door opener because it loses its connection with the remote or keypad after battery replacement.
Lastly, you may want to reset your garage opener if you want to disable it for good.
If you’re in any of these situations, then let me guide you through the reset process.
How to reset Chamberlain garage door opener
Keep in mind that older models may have a different motor unit design or setup, but the underlying principles are often the same.
Whether it’s a newer or older model, make sure the door is closed before resetting the opener, and follow any additional safety tips outlined in your user manual.
The process to reset is honestly quite simple.
All you need is a single button: the Learn button.
You can perform this reset via the garage door opener itself or the Control Panel.
The Learn button on the garage door opener is typically located on the back or side of the motor housing and is color-coded, possibly yellow, red, purple, or green, depending on your particular model.
Here’s how to perform a reset:
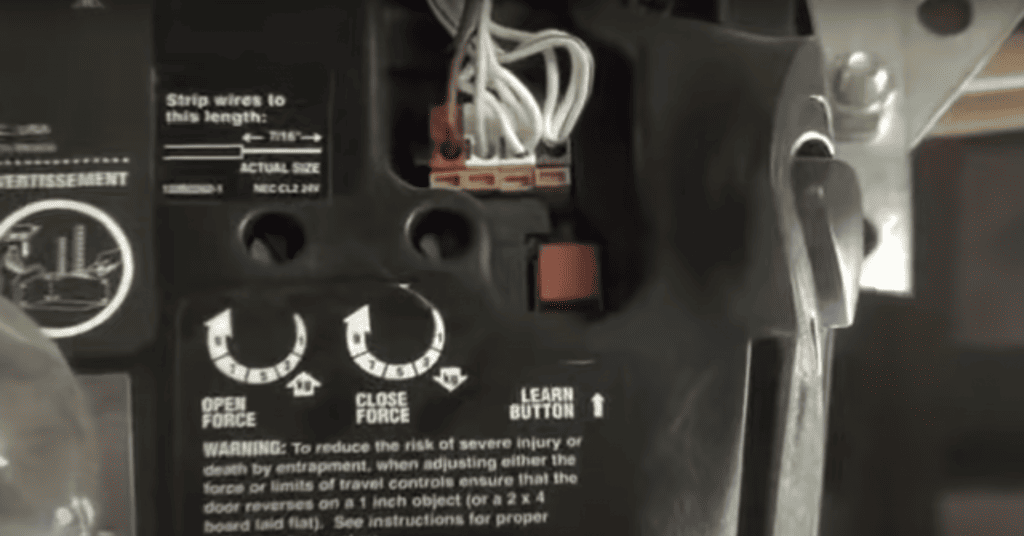
- Look for the Learn button (on either the garage door opener or Control Panel.)
- Press and hold the Learn button for 6-8 seconds until the LED light turns off, clearing its memory.
And there you have it! Once the light turns off, all previous remote control and keyless entry codes are wiped.
After the memory is cleared, your garage door opener is all set for new settings.
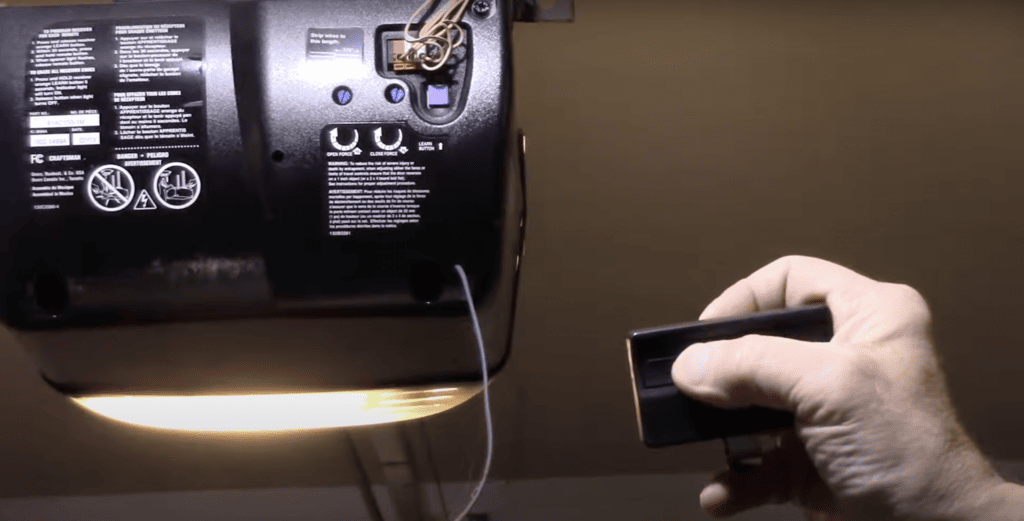
Give it a try. Your remote shouldn’t have any effect on your freshly reset garage door opener.
How to reprogram the remote control and keypad
You might want to pair your remote control or keypad with your Chamberlain garage door opener again after a reset.
First, ensure your remote control is loaded with fresh batteries so you don’t run into connection issues due to depleted batteries.
You can reprogram your remote control or keypad using your garage door opener or Control Panel (if available).
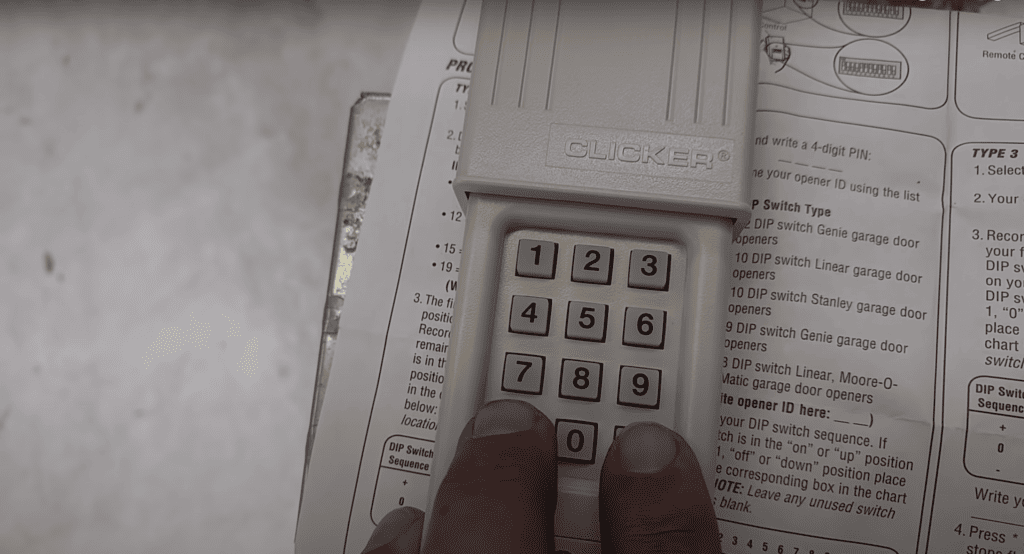
Remember that you’ll need to know your Garage Opener Type code to reprogram a keypad, which should be in the manual.
If you’ve misplaced the manual, check the “Lost the Manual?” section of this article, where you’ll find the link to the digital manuals library.
1. Through the garage door opener unit
For Remote
If your remote has a Program button beneath the battery cover, press that button first until the LED lights up. If none, just proceed to the next step.
Follow these steps:
- Press the garage door opener’s Learn button once until the LED light turns on (Just a light press. Do not long-press!)
At this point, once the LED illuminates, you have 30 seconds to complete the programming.
- On your remote, press the button that you want to program until the remote light starts blinking.
- Once the blinking stops, press the remote’s button again.
- Continue pressing multiple times until the garage door opener responds and flashes a light or makes a click sound.
- Exit programming mode by pressing the Program button (for remote with Program button only)
Pro Tip: The user manual can tell you exactly how many times you should press the button on the remote.
Always test the remote after programming to confirm everything works as expected.
For Keypad
Here’s what you need to do:
- Hold down the pound (#) and asterisk (*) keys simultaneously until the blinking stops.
- On your keypad, press and hold the four-digit PIN you want to use.
- Press the pound (#) key to confirm PIN.
- Type your Garage Opener Type code.
- Press pound (#) again.
- Press the garage door opener’s Learn button once.
- Re-enter your PIN, followed by 0.
Your garage door opener will respond either with a click sound or by flashing its lights. This indicates a successful connection between your keypad and opener.
Remember to test your new PIN right after. If the garage door doesn’t open or close, redo the process until you achieve a successful connection.
2. Through the Control Panel
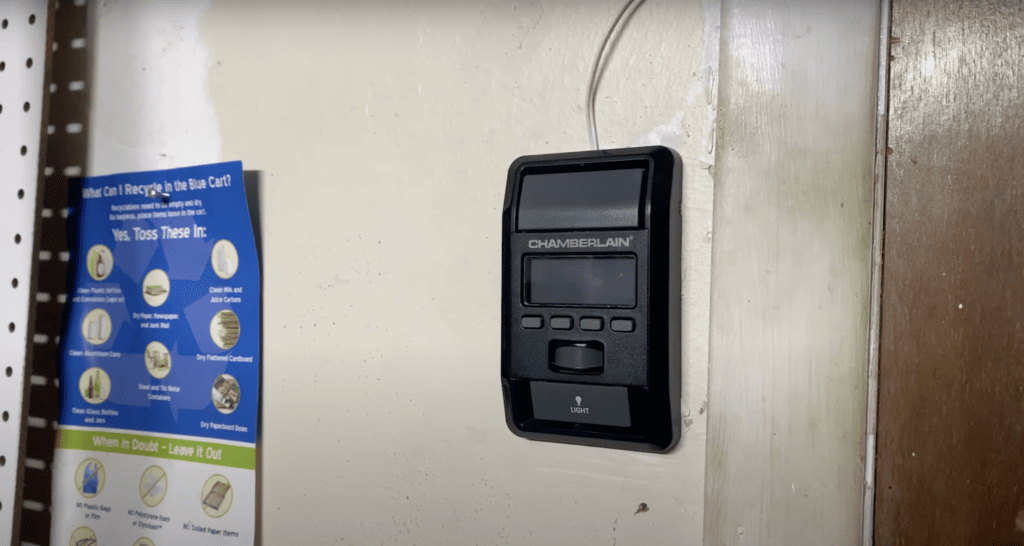
There are several styles of Control Panel. Follow the steps suitable for your Control Panel’s type.
For remote
– Multifunction Control Panel, Motion Detection Control Panel
If your remote has a Program button hidden under the battery cover, push that button first until the LED lights up. If there’s no such button, proceed to the next instruction.
- Press the Learn button on your Control Panel until the light blinks.
- Press the Learn button for the second time until the light blinks.
- Press and release the button on the remote control you wish to program. (The process is successful if the garage door opener’s lights flash or a clicking sound can be heard)
- Exit the programming mode by pressing the Program button (only if your remote has a Program button.)
– Smart Control Panel with LCD
If your remote features a Program button beneath the battery cover, press that initially until the LED lights up. If that’s not the case, move on to the next step.
- On your Control Panel, navigate to Menu > Program > Remote.
- Press and release the button on the remote control you wish to program.(Programming is successful if you see the garage door opener’s lights flash or make a click sound)
- Exit programming mode by pressing the Program button (only if your remote has a Program button.)
If your remote has a Program button stashed under the battery cover, press that first until the LED lights up. Otherwise, go to the next step.
- Press and hold the Side button and front button simultaneously until the light blinks once.
- Press and release the button on the remote control you wish to program. (The process is successful if the garage door opener’s lights flash or a clicking sound can be heard)
- Exit programming mode by pressing the Program button (only if your remote has a Program button.)
For Keypad
– Multifunction Control Panel, Motion Detection Control Panel
Follow these steps:
- Simultaneously hold down the pound (#) and asterisk (*) keys until the blinking stops
- On your keypad, press and hold the four-digit PIN you want to use.
- Press the pound (#) key to confirm PIN.
- Type your Garage Opener Type code.
- Press pound (#) again.
- Press the Learn button on your Control Panel until the light blinks.
- Press the Learn button for the second time until the light blinks.
- Type your PIN again, followed by 0.
Watch out for the garage door opener’s light or click sound.
– Smart Control Panel with LCD
Follow these steps:
- Simultaneously hold down the pound (#) and asterisk (*) keys until the blinking stops
- On your keypad, press and hold the four-digit PIN you want to use.
- Press the pound (#) key to confirm PIN.
- Type your Garage Opener Type code.
- Press pound (#) again.
- On your Control Panel, navigate to Menu > Program > Keypad.
- Type your PIN again, followed by 0.
Check if the garage door opener sends a light signal or click sound.
Here are the steps:
- Simultaneously hold down the pound (#) and asterisk (*) keys until the blinking stops
- On your keypad, press and hold the four-digit PIN you want to use.
- Press the pound (#) key to confirm PIN.
- Type your Garage Opener Type code.
- Press pound (#) again.
- Press and hold the Side button and front button simultaneously until the light blinks once.
- Type your PIN again, followed by 0.
The click sound or light flash in the garage door opener confirms a successful programming.
If you want a visual guide, you can check Chamberlain’s Youtube account.
Lost the manual?
If you’ve misplaced it (we’ve all been there!), there’s no need to panic – head over to Chamberlain support site to access a digital copy.
Remember, though, you’ll need to know the model of your unit before you can search for it on the website.
Here’s how to find it: Take a look at the motor unit of your garage door opener. You should find a label or sticker that shows the model info.
Once you have that, you can go and find your specific garage door opener model on the Chamberlain support site (linked above).
Is unplugging works the same as resetting?
Let’s clear up a common misconception.
A lot of Chamberlain Door Opener owners are under the impression that just unplugging the unit from its power source effectively resets it.
Here’s the truth: Unplugging is a power refresh, not a proper reset.
I want to emphasize that simply unplugging the opener doesn’t equate to a reset.
All programmed remotes and keypads are still paired to the garage door opener and will resume working as usual once the garage door opener is plugged back in.
Of course, you can unplug it if you’re experiencing issues like remote control glitches or sensor misalignments and need a quick power refresh. But if that doesn’t solve the problem, remember that there’s a proper reset process to follow.
When to contact Chamberlain customer support

The reset is the last step of every troubleshooting.
If things still aren’t working right or if you’re running into trouble during the reset procedure, it’s time to reach out to Chamberlain customer support.
You can contact them via phone, email, or live chat on their website to get personalized help.
Their customer support team is there for you for any tech issues you come across with your garage door opener, not just reset troubles.
Got another tech issue with your Chamberlain garage door opener?
Well, your user manual is always a good place to start.
Within those pages, you’ll find a variety of useful information specifically for your model of opener.
It’ll have sections on installation, programming, and troubleshooting – just focus on the parts that pertain to your current issue.
The manuals serve as a great guide, helping you follow steps that are specifically designed for your device, thus saving you unnecessary time and effort.
Additionally, you can also browse through their Chamberlain support site.
I highly recommend this site as it’s a one-stop resource – it has manuals, video guides, parts lists and diagrams for every product, and pages dedicated to their product range.
Of course, if you prefer a more personal touch, Chamberlain provides customer support (linked above) through multiple channels. Don’t hesitate to get in touch.
Wrapping up
Resetting your Chamberlain garage door opener may seem intimidating, but armed with this article, your user manual and a little persistence, you’ll have it up and running in no time.
To reset your Chamberlain garage door opener, all you need to do is to press the Learn button for a few seconds, and that’s it!
Your unit will have all remote and key codes cleared.
If you need to reprogram your remote and keypad, you can do that using either the Control Panel or the garage door opener unit.
Don’t forget to have your garage door opener type code on hand for a smooth programming experience!
Best of luck, and here’s to the renewed operation of your garage door system!