
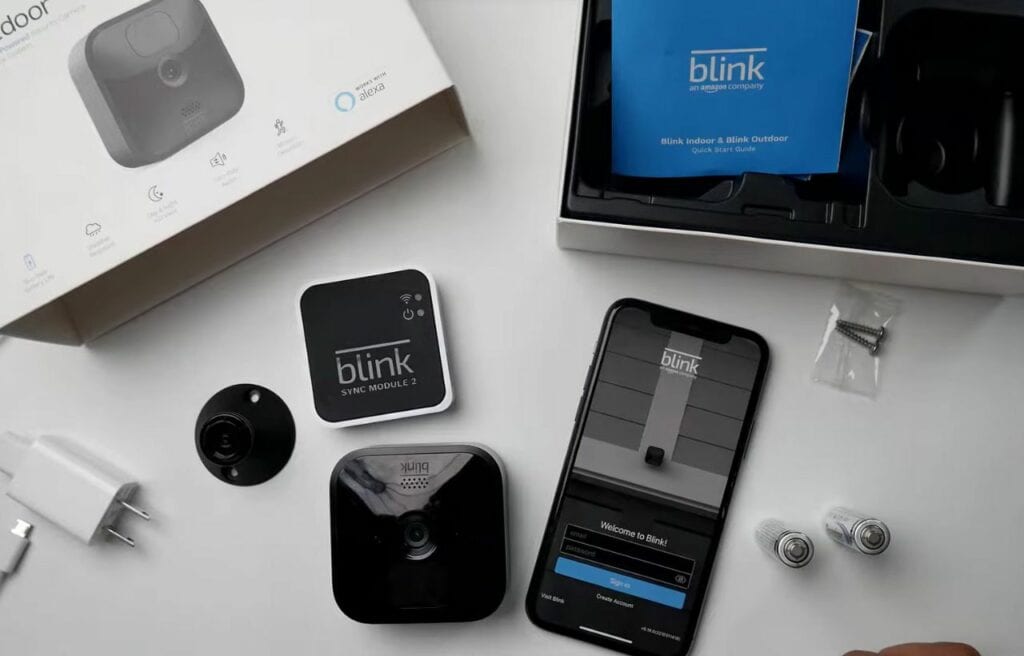
“What do I set up first? Should I mount the outdoor camera right away? And what on earth is this box device (Sync Module) for?”
In this article, I’ll be covering the specific details of every setup process step and the crucial things you should know before, during, and after your Blink camera setup.
This will help you avoid common pitfalls and really tap into the full potential of your new gadget.
Scroll on, and let’s get your Blink camera up and running!
The Clever Fix:
The setup process pattern is app > Sync Module > Blink Camera.
Best practices
Before diving into the mechanics of the setup, I want to share some pointers that you should follow before, during and after setting up your Blink camera.
Snap a pic of the QR code
Let’s say, down the line, your camera starts misbehaving, or somehow disconnects from your app. One fix could be to re-pair the camera with the app, and to do this you’ll need to scan the QR code again.
Snapping a picture of the QR code during setup will save you climbing up a ladder, unmounting the camera, and opening it each time you need the code.
Printing it might be an even better idea, as it means you won’t need to move the camera at all.
Give the Blink Outdoor Camera a test run
After setting up the Blink camera, place it in a temporary location before mounting it somewhere hard to reach.
Give yourself time to check its performance and familiarize yourself with the app and the camera unit.
Configure the settings according to your liking.
Once you’re comfortable with how it all works, secure the camera in your desired spot.
Ready the flash drive
The Blink Outdoor Camera package doesn’t come with a flash drive.
If you plan on using local storage instead of a paid subscription, have a flash drive at the ready before starting the setup.
Having the flash drive handy will allow you to test both the recording and local storage functions all in one go.
If you’re wondering what flash drive to get, the Blink Sync Module can support up to a 256 GB flash drive.
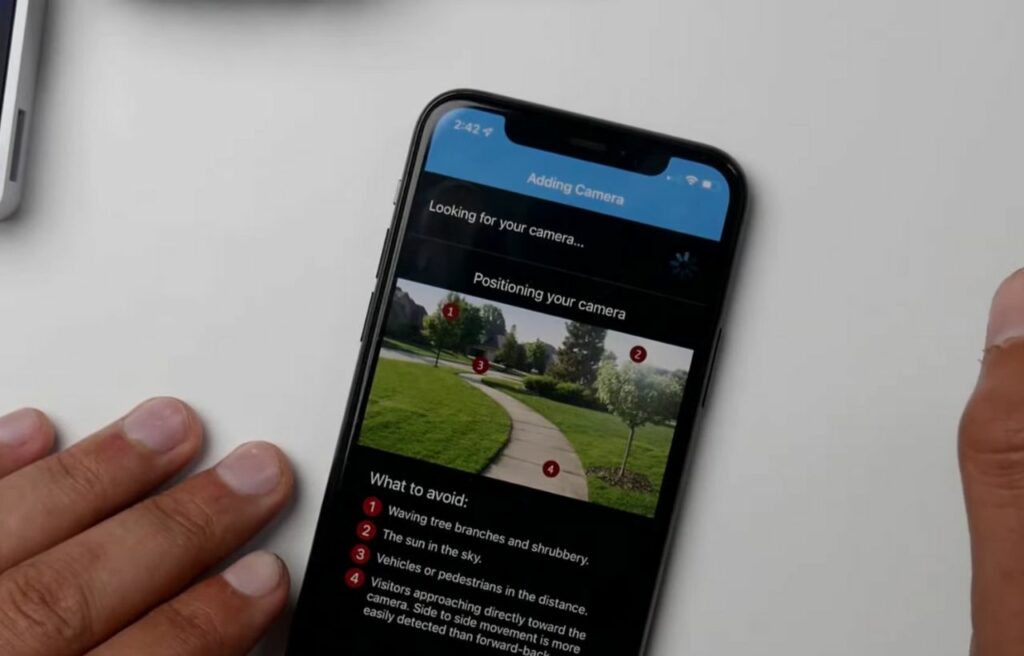
Angle the camera for optimal motion detection
The camera struggles to detect object movement when it’s directly toward the camera.
For better motion detection, position the camera in a location where motion is more likely to be side-to-side within the frame.
How to set up Blink outdoor camera
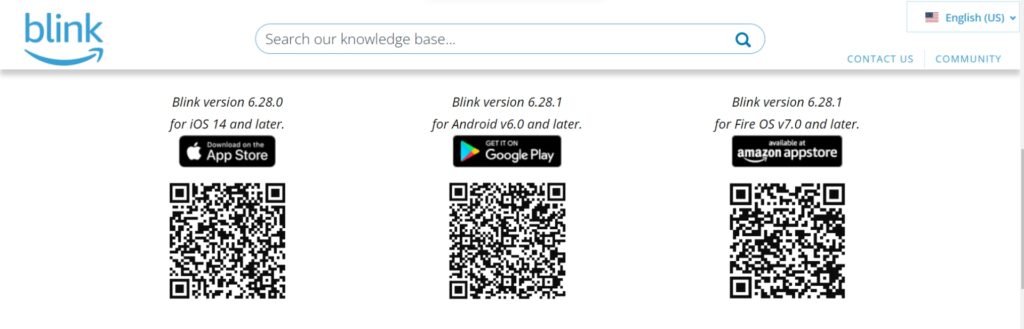
1. Install the Blink app
The Blink app is available for download on both the App Store (iOS) and Play Store (Android).
Tip: If you’re viewing this article from your laptop, simply use your phone to scan the QR code that will direct you towards the Blink app install page.
After you’ve been redirected to the App Store/Play Store, click Install and wait for it to finish downloading.
2. Setup a Blink account
Once your app is downloaded, we’re ready to create a Blink account for your security system.
Open the Blink app, and let’s get started!
To set up your Blink account, follow these steps:
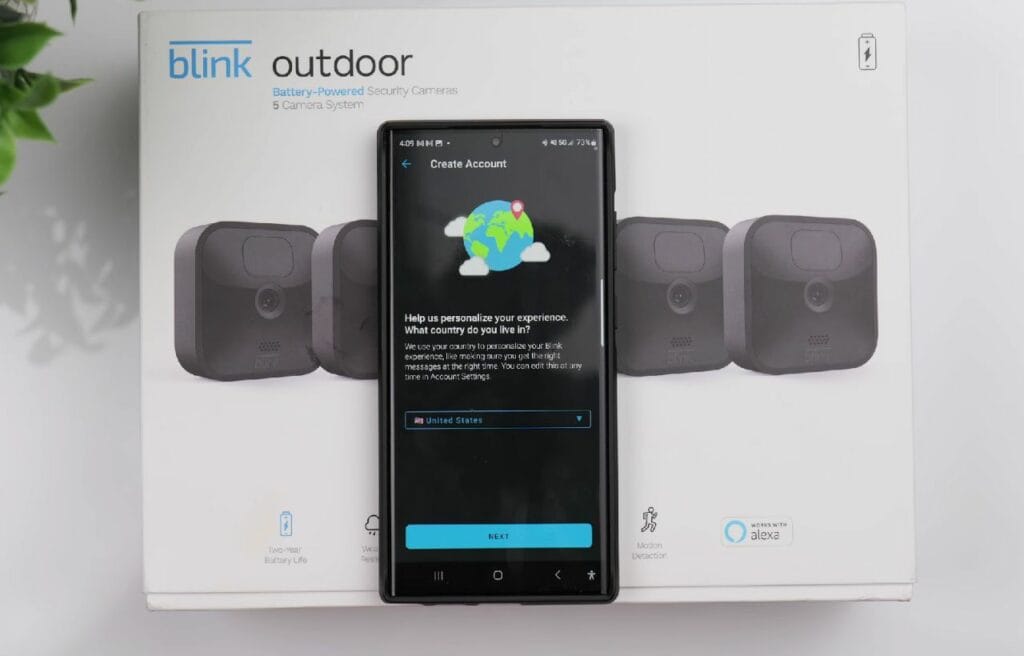
- On the Blink app, click on Create Account.
- Choose your current country location on the drop-down menu, then click Next.
- Confirm your region, then tap OK.
- Type in your email address, then click Next.
- Create a password, then click Create Account.
- Finish setting up by completing the multi-factor authentication (MFA) process.
(You will receive an email and text message with the verification codes.)
- Link your Blink account to your Amazon account. (optional)
- Select Blink Wireless Camera System to launch the app’s camera.
Up next, we’ll connect the Sync Module (that square device you found in the package) to your Blink app.
Do I need to link my Blink and Amazon account?
Wondering about the need to link your Blink and Amazon accounts?
Well, if you’re planning to take an active subscription plan, you’ll need to link these accounts.
It can be handy if you have multiple accounts since you’ll be able to manage all your Blink subscription plans from one place.
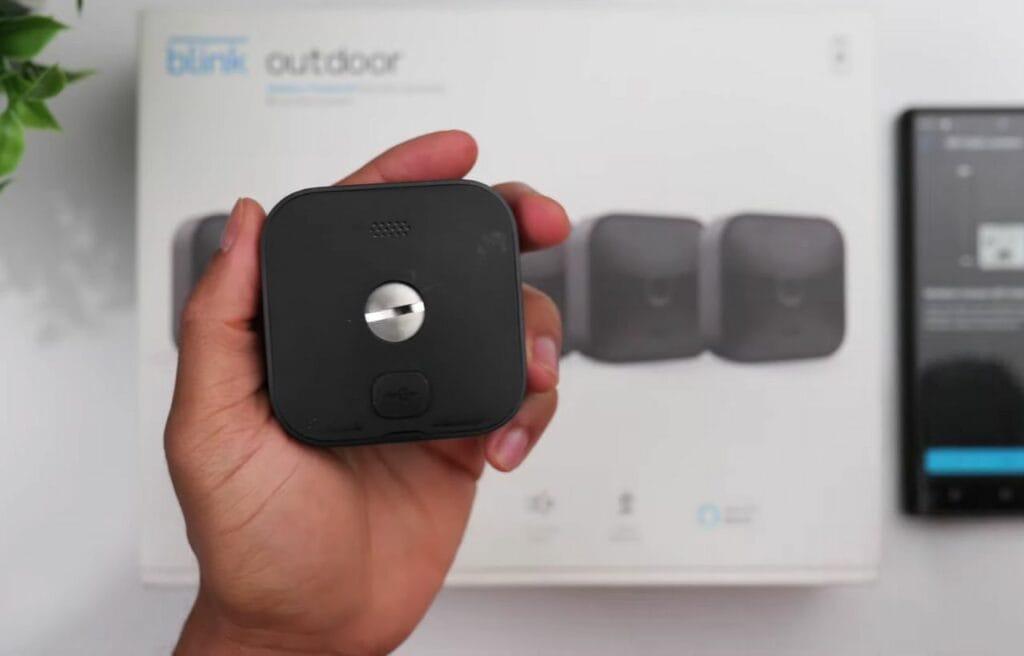
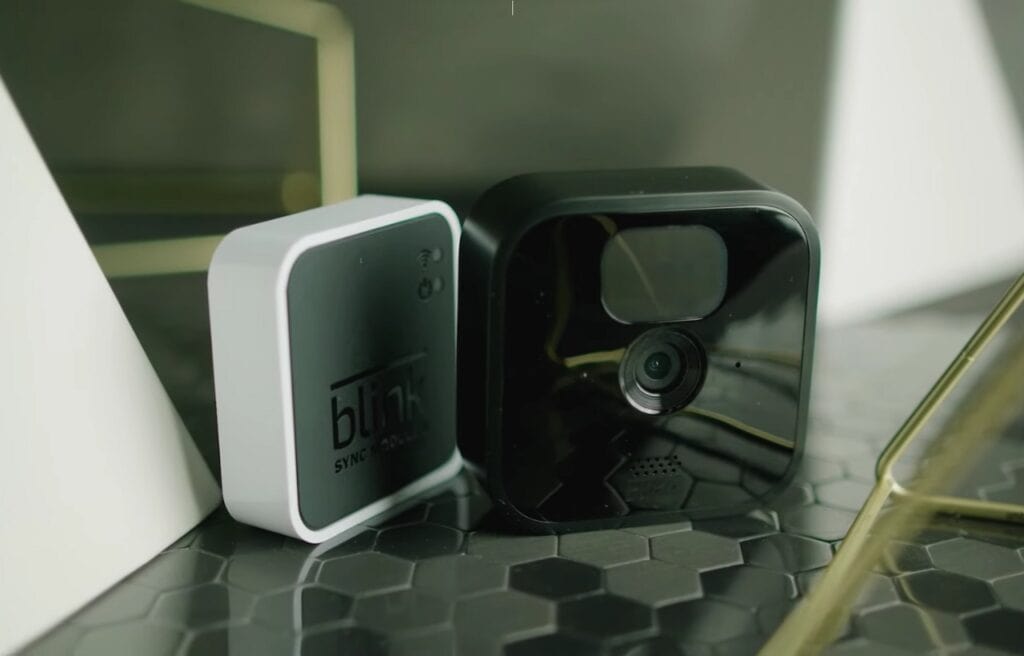
3. Set up the Sync Module
Think of the Sync Module as the captain of your Blink system.
It can manage up to 10 Blink cameras and lets you arm all devices at once.
If you’re using Sync Module 2, it supports local storage, meaning you can store recorded clips on a flash drive. This can be a great alternative to a monthly cloud subscription.
Now, back to the setup process.
The app camera will open when you click the Blink Wireless Camera System (as mentioned in the previous step). You’ll use that to scan the QR code on the Sync Module.
Again, for your convenience, snap a photo of the QR code for easy retrieval whenever needed.
Here’s how to set up the Sync Module:
- Peel off the blue tape at the back of the Sync Module.
- Scan the QR code using your phone.
(Alternatively, enter the serial number manually if you can’t scan the code by tapping Enter Serial Manually.)
- Name the Sync Module, then tap Next.
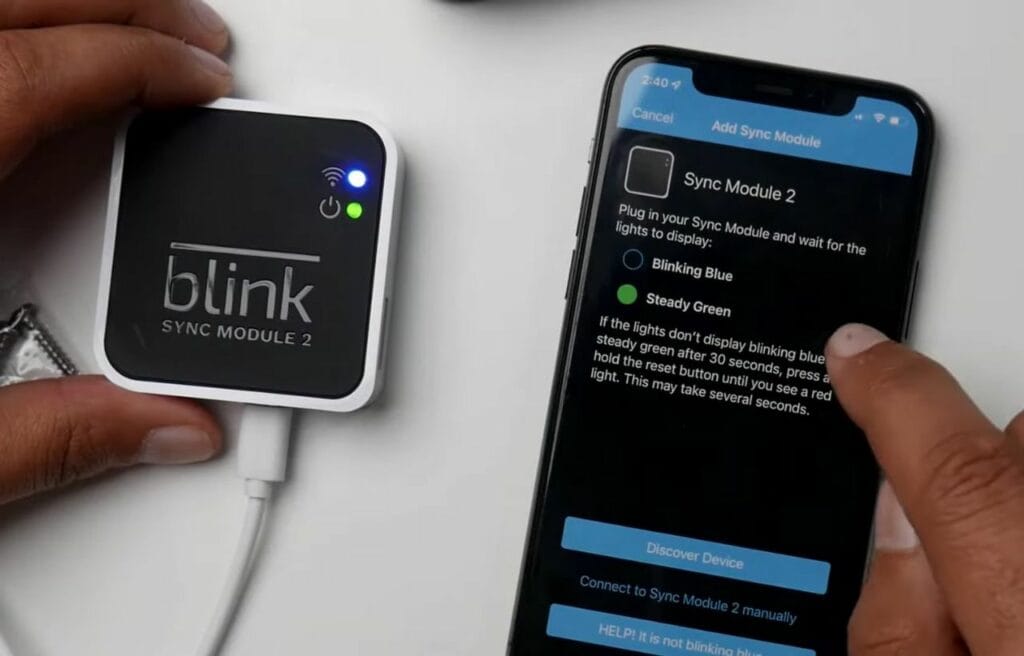
- Plug the Sync Module into the power socket.
- Wait until a blinking blue light and steady green light indicator appear on the Sync Module.
- Once the light indicators appear, tap on Discover Device.
- Tap OK on the prompt message asking to connect to a temporary Wi-Fi.
- Select the Blink device that appears on the screen.
- Connect it to your Wi-Fi by choosing the network and typing the password.
- Wait for the Sync Module to connect to the network successfully.
- Once you are redirected to the app’s homepage, plug in the flash drive (if you have one.)
So, that’s the Sync Module sorted.
Now, let’s deal with your Blink outdoor camera.
4. Prepare the Blink camera
We don’t want to accidentally break your new Blink camera before we even start using it, do we?
Let’s make sure we open it safely.
Here’s the drill:
- Remove the circular cover from the back of the Blink outdoor camera.
- Use the opening tool included in the package to twist the screw.
(if you lose this tool, a coin or flathead screwdriver will do the trick).
- Twist the screw counter-clockwise until the back cover comes off.
- Remove the blue tape covering the QR code and the serial number.
- Insert two (2) AA lithium batteries.
5. Connect the Blink camera to the app
Now is the time to connect your camera to the app (and the Sync Module) and watch the magic happen.
You will encounter another QR code at this point as well.
Be sure to take a photo of it for easy retrieval in case you need to re-pair your camera in the future.
Here’s what you need to do:
- Tap the + icon on the top right corner of the app’s homepage.
- Click on Blink Wireless Camera.
- Point your phone camera at the QR code.
(if you can’t scan, tap Enter Serial Manually to enter the serial number).
- Wait for a few minutes until a “cameras added successfully” message appears on the screen, then click Done.
Once this is done, your Blink outdoor camera is fully connected.
You can now put the back cover back on and lock the screw clockwise.
Be sure to screw it nice and tight to prevent water from penetrating inside the device.
6. Check its features and modify settings
Now comes the fun part!
Take some time to check out the camera’s features and feel your way around the settings.
Your level of comfort with your new camera will depend on how much time you’re willing to invest at this stage.
Position the camera in a temporary location and test its features.
Try out two-way communication, recording, motion detection, video quality, and live view. You’ll find these options at the end of the setup process.
Take a tour around the app to get more comfortable with the interface.
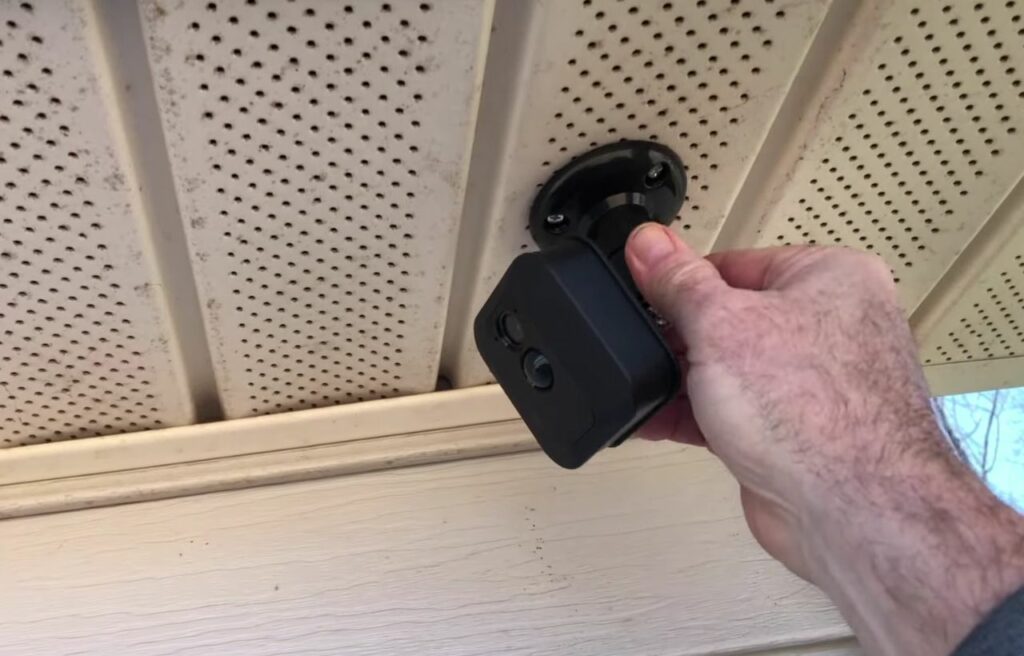
7. Position the Blink outdoor camera and Sync Module
Now you need to find the best locations for your Blink camera and Sync Module.
They don’t need to be close to each other but the Sync Module should be near the Wi-Fi router for the best signal strength.
The ideal distance for the Sync Module from your Wi-Fi router is no less than 3 ft. (1 m) and no more than 10 ft. (3 m).
You can place it on a window sill, a TV stand or cabinet, or anywhere within range of the Wi-Fi.
As for the Blink camera, be sure not to place it too high or else the motion detection might not activate (ideally it should be around 8-9 feet high).
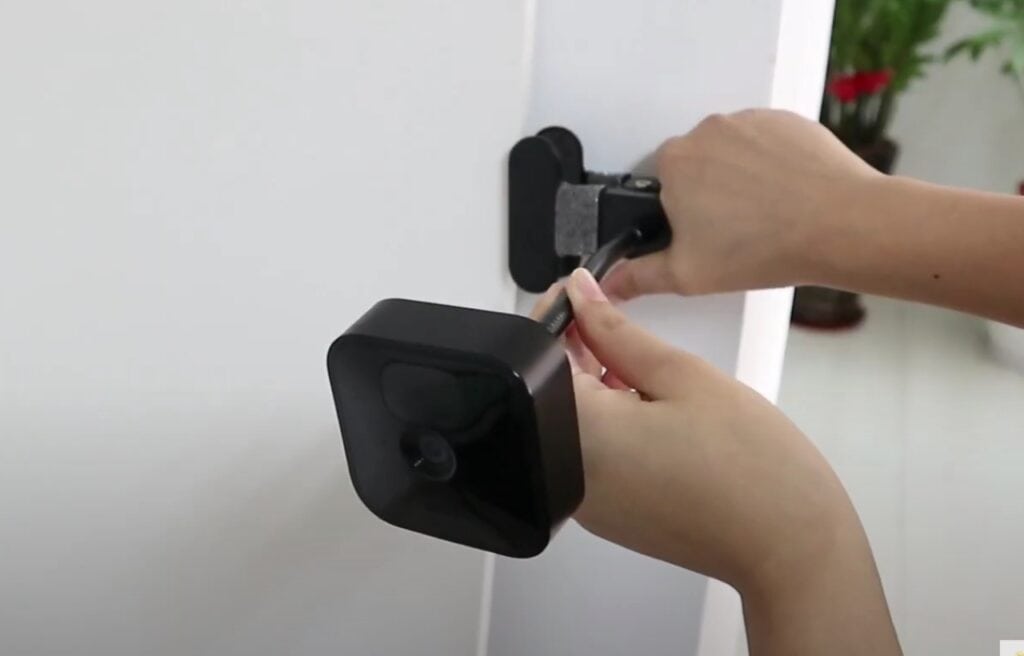
Once you’ve found the perfect spots, screw the volcano-shaped mounting bracket onto your chosen location, then snap the Blink camera on through the circular hole at the back. Angle the camera view to your liking.
How to add more cameras
Since the Sync Module enables you to control multiple cameras, you might be wondering if you need to go through the same process if you want to install more cameras in your home.
Don’t worry, setting up an additional camera is relatively easy.
From the app’s home screen, just click on the + icon to add a new device. Then, follow Step 5: Connect the Blink camera to the Sync Module.
What are the alternatives to the mounting bracket?
If you can’t drill holes in your chosen camera placement, you need to search for a non-scratching mounting alternative.
I can advise you to try any of the following:
- Siding clip hooks (like this one)
- Clip-on Blink camera clamps (check this)
- Flexible pole tripod (check here to see what it looks like)
While some folks use command strips that reportedly withstand rain and extreme heat, I wouldn’t rely on an adhesive, especially in a location where the weather might affect the performance. You don’t want your Blink camera suddenly dropping to the ground!
Do I need a flash drive if I plan on a monthly cloud subscription?
Using local storage is entirely your call.
If you’re planning on a cloud subscription, then no need for the flash drive.
The recording will work without it, and your clips will be saved directly to your cloud storage.
The clips in the cloud will only be stored until they reach the auto-delete age (60 days by default; 30 days in the EU and UK).
Flash drive + subscription
Having both a flash drive and a subscription means that clips will be automatically stored in the cloud, and the flash drive will back up your recorded clips.
The advantage of having both is that unlike the cloud storage, you can keep the recorded clips in the local storage for as long as you like – until the storage is full, of course. Then, you’ll need to clear some space.
Wrapping up
Setting up your Blink outdoor camera is pretty straightforward.
The process boils down to creating a Blink account, and then connecting the Sync Module and camera to the app.
Here’s how to set up the Blink outdoor camera:
- Install the app.
- Set up a Blink account.
- Set up the Sync Module.
- Prepare the Blink camera.
- Connect the Blink camera to the app.
- Check its features and modify the settings.
- Position the Blink camera and Sync Module.
If you run into trouble connecting your outdoor camera to the app, even after following this procedure, reach out to Blink customer support for assistance.
There might be an issue with your unit if it’s not connecting correctly.
Should you encounter any issues with your Blink camera down the line, remember that CleverFixes.com got your back.
You’ll find the best guides for your Blink camera troubles – whether it’s not working, not recording, and more!.
Are you all set to use your Blink outdoor camera to keep an eye on your home? How’s it working for you so far?