The WPS PIN is like a magic key to unlock wireless printing freedom with your HP printer.
Without it, you wouldn’t be completely harnessing the power and convenience of your HP printer’s wireless feature.
Kudos to you for turning to Google instead of endlessly flipping through the manual or examining the box from every angle, because spoiler alert: the WPS PIN isn’t hidden there.
Be ready to act quickly once your WPS PIN is generated—you’ve got a brisk 90 seconds to enter it before it expires. But don’t stress; that’s plenty of time.
The Clever Fix
You can find your WPS PIN by going to Wi-Fi Protected Setup on your HP printer’s LED screen or by printing out the network configuration page. Keep reading for step-by-step instructions.
Choosing to go wireless can be a total game-changer, especially if your computer and printer are playing a game of long-distance tag, or you’re just tired of wrestling with a jungle of wires and cables.
Your HP printer offers the luxury of convenient wireless printing, so why not fully embrace it?
So, let’s get down to business and learn how to generate the WPS PIN, regardless of whether your printer sports a built-in screen or not.
Plus, I’ll walk you through an alternate method to kickstart wireless printing, sans WPS PIN.
Are you all set to break free from the cable chains and welcome wireless?
Let’s dive right in!
The WPS PIN – What and where is it?
The WPS PIN acts like a security guard, ensuring that only recognized users can link up with the HP printer.
Great in theory, unless you, the owner, are also in the dark about this elusive code!
The catch is, the WPS PIN isn’t just lounging around—you’ve got to create it.
You can do this either via the printer’s display/control panel or by printing the network configuration page.
The required steps can vary depending on whether your printer has a built-in screen. So, be sure to stick to the relevant process for your specific HP printer model.
Ready to unlock this mystery? Let’s get started!
How to generate the WPS PIN
1. Look at the printer’s built-in LED screen

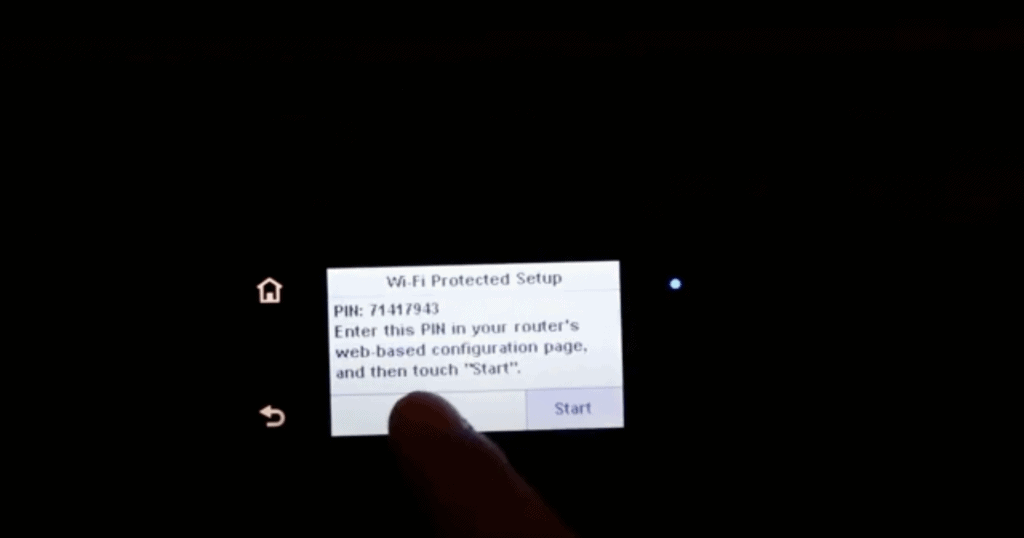
If your HP printer model has a built-in LED screen, like the HP LaserJet or HP Envy 4520, here’s how to generate and connect with the WPS PIN:
- Ensure that the printer is powered on.
- On the computer screen, select Add Printer from the Control Panel.
- Select the printer you want to connect to.
- On the printer, press the Wireless button.
- On the printer screen, go to Settings (gear icon) > Network Setup > Wireless Settings > Wi-Fi Protected Setup > WPS PIN.
The 8-digit code that appears on your screen is the WPS PIN.
Remember, you only have 90 seconds to input this PIN into your computer’s WPS PIN prompt.
Once the WPS PIN is entered, your HP printer should be successfully connected wirelessly to your computer.
Print a document to test it.

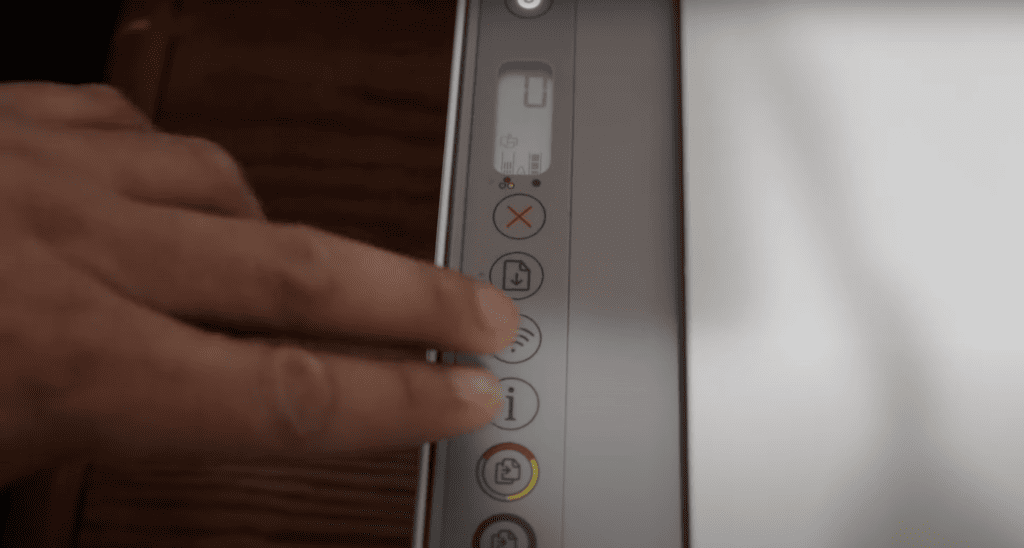
If you have an older version where your printer doesn’t have a display screen, like the HP DeskJet 2652 or HP DeskJet 2600, then luck is actually on your side.
Generating the WPS PIN is a no-sweat procedure in your case. It will only take pressing two buttons, and that’s it!
Ensure your printer’s paper tray is loaded as you’ll need to print a page containing the WPS PIN.
Here’s how to do it:
- Press the ‘Info’ and ‘Wireless’ buttons on your printer simultaneously for a few seconds until it prints a page.
- Find the WPS PIN in the printed document, then input it into the WPS PIN prompt on your computer.
3. Use the HP Smart app

Here’s a little-known trick: you can find the WPS PIN using the HP Smart app.
The HP Smart app is like a portal to the advanced features and settings of your printer – including the WPS PIN.
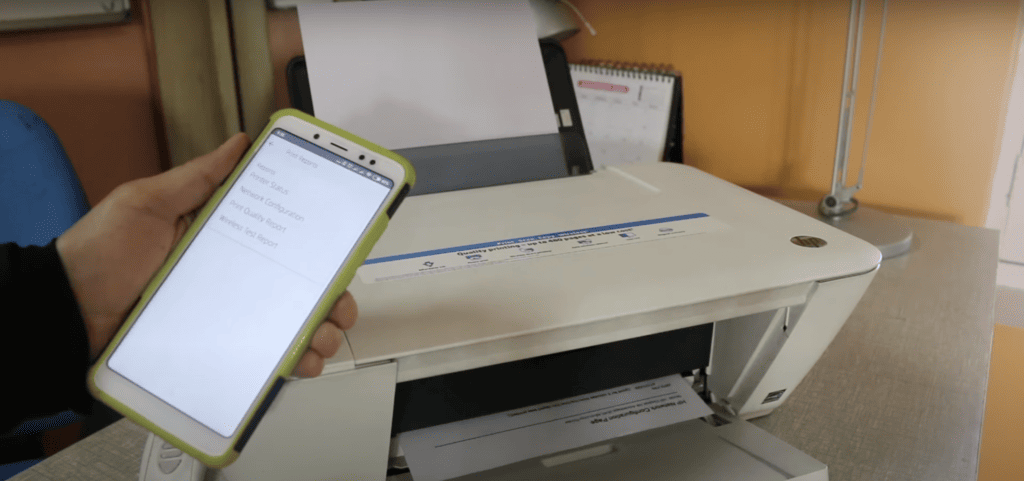
From your cell phone or tablet, you can print the network configuration page that has the WPS PIN.
If you don’t have the app yet, you can download it from the App store (iOS) or Play store (Android).
Make sure your printer is turned on, your app is open, and there’s paper ready in the printer’s tray.
Follow these steps to generate the WPS PIN using the HP Smart App:
- Press the Wireless button to enable wireless connection.
- Connect your phone to your printer’s Wi-Fi by going to your phone’s Wi-Fi settings.
- Once connected, open the HP smart app, then go to Printer Settings > Printer Reports > Network Configuration.
The printing should start once you click the Network Configuration. That’s it! The WPS PIN is on the printed page.
Try printing a document to confirm it’s working.
What to do if the generated WPS PIN didn’t work
If for some reason the generated PIN doesn’t work, it may have expired or there may be a minor system glitch at play.
Simply restart your computer, power cycle your printer, and generate a new PIN.
What to do if no WPS PIN printed or appeared on the printer
If your printer fails to generate a WPS PIN – it doesn’t appear on the LED screen, it’s printing blank pages, or the WPS PIN section is blank on the printed sheet – here are a few things you can try:
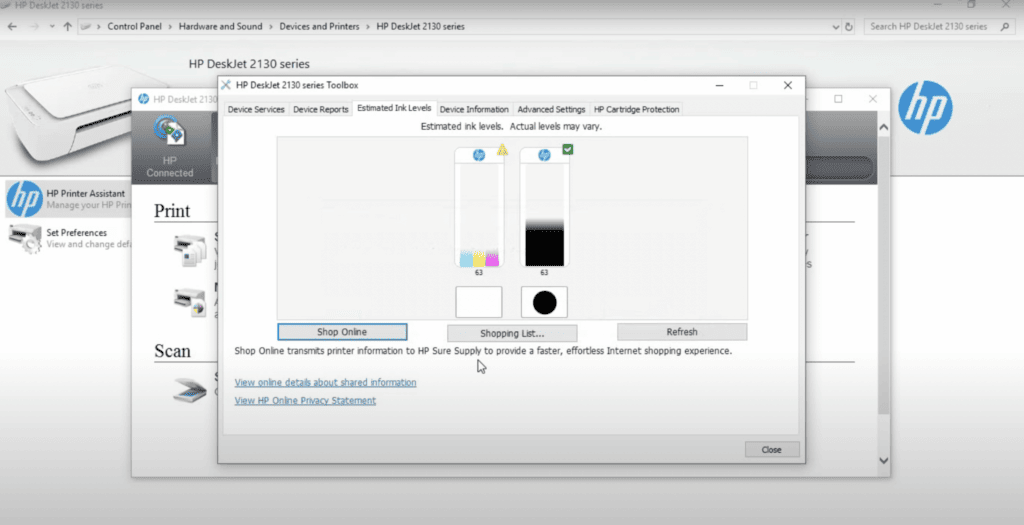
Check the ink cartridge

You might be surprised, but some HP printer owners have encountered this issue because their printer was out of ink. This might be a long shot, but it’s worth checking the ink status.
Contact HP support
You can do the alternative method (use the WPS Push button) to enable wireless printing, but we should not disregard why you can’t generate a WPS PIN.
There could be an underlying software or hardware issue that needs professional attention.
If you’ve tried all the methods and still can’t generate a WPS PIN, it’s time to reach out to HP Support. Contact HP Support by calling (855) 785-2777.
It’s especially important to get in touch if your printer is still under warranty.
Alternative to WPS PIN
The WPS Push button method is actually an alternative way to connect your printer to your computer and enable wireless printing, but this is not for everyone because not all Wi-Fi routers have a WPS button.
If your Wi-Fi router has a WPS button, here’s how you can do it:
- Turn on the HP printer.
- Set the printer in WPS connection mode.
For printers without an LED screen
Press the Wireless button for at least 3 seconds until the light indicator starts flashing.
For printers with an LED screen
You need to navigate to Settings (gear icon) > Network Setup > Wireless Settings > Wi-Fi Protected Setup > Push Button > Start.
For HP Deskjet 6000 and 6400, ENVY 6000 and 6400, and Tango printers
Long press the Wi-Fi and Power buttons simultaneously for 5 seconds until the blue bar flashes.
- On your Wi-Fi router, press the WPS button for 3-5 seconds.
- Wait for a few minutes until your HP printer’s Wireless button shows a steady light and your Wi-Fi router’s WPS light is off.
Now try printing to ensure the wireless printing is functional.
Wrapping up
Generating the WPS PIN might seem complicated since it’s not a standard code found on the box or in the printer documentation.
Remember that the WPS PIN can be seen on the printer’s LED screen or be printed.
If your printer has an LED screen, you can simply navigate through the Wireless settings for the WPS PIN.
If there’s no screen, you can print the network configuration page containing the WPS PIN by just pressing two buttons (Info + Wireless buttons) or print it using the HP Smart app.
If you didn’t manage to get the WPS PIN with any of these methods, there might have been a system glitch or lack of ink in the cartridge.
After checking the ink status, you can try the WPS push button method if your Wi-Fi router has a WPS push button.
If all else fails and you’re still having trouble, don’t hesitate to contact HP support for help.
I hope this guide helped you get your printer working!


